Wednesday, May 11, 2016

Calypso IV and J.....Break out the tools!

A frequent question on the Vintage Double Hose website message forum goes something like....I want to service my own regulator. What model should I start with?
Look no further than the Calypso IV or Calypso J....These were made by US Divers forever and can be found at swap meets, Craigslist, garage sales, on line auctions for CHEAP.  They are a robust no frills regulator that got thousands of divers in the water and can be easily serviced with a few basic hand tools and a little patience.
At the bottom of the page I'll post links to the US Divers service manual and some service notes I made. 
Aside from basic hand tools you will need an IP gauge and a few picks to remove internal and external O-rings. Insure that you only use picks made from plastic or brass as damaging sealing surfaces using stainless picks can leave you with a regulator that no longer seals up tight.  You can easily make O-ring picks from brass fishhooks of various sizes.
The only worrisome spot on this regulator is it's high pressure seat as it is unique to this model and no longer reproduced. I do have originals but they are not cheap.  With a little care and patience you can most likely bring yours back to life.
The US Divers manual calls for an Easy Out from McMaster Carr or Sears to remove the high pressure seat....Seems like a bit of overkill since the only thing holding the seat in place is an O-ring
I have found that a small wood screw with the sharp point ground off works great to remove the seat. 
The center of the high pressure seat is a hollow brass cylinder and by turning the screw with my fingers only I can get it to grab just enough to pull the seat straight out. 
The center brass cylinder slips out of the nylon section of the seat 
Use a piece of 1500 grit or emery paper on a flat surface and slowly move the seat face back and forth you can remove the groove made by the piston. Be sure to go slow and check your work often. Only remove material until the groove is gone. 
Be sure to re-assemble the seat and brass cylinder the correct way and lightly lubricate the O-ring around the hp seat. Push it back into place till it seats with a pencil eraser or wood dowel. Do not press on the high pressure seat with metal tools!
The other challenging area of this regulator is the bonnet nut which contain internally the sealing O-ring and backup washer for the piston. In the service kit I have included the traditional PFTE split washer along with the updated version. Either one works fine but the updated one is easier to put in place. When using the updated ring be sure the groove side faces the O-ring Be sure to assemble in the correct order. (follow the manual)
This model was always paired with the tried and true 1085 second stage 
which is just as easy to service as the first stage and the service procedures for it are in this manual.
You will find the service kit for the Calypso First Stage and the 1085 second stage (Blue Kit)  in the Vintage Double Hose website store. 


The Calypso regulator is no substitute for a Double Hose but it is a good choice for a reliable vintage single hose regulator.  Your dive buddies may scoff at it's utilitarian features but when their Super Gonkulator titanium 12 heat sink 5 lever greatest regulator ever goes tits up on a dive trip you can slap on your Calypso and go diving. 

Pet Peeve 101.....After your first and second stages are serviced and setup you need to actuate the breathing cycle a minimum of 50 times allowing the 1st and 2nd stage seats to get in their groove so to speak and then do a final check of your IP and lever height. 
DO NOT tap on the purge button like the Space Invaders FIRE button to do this.....Think about it....Is this how you breathe? If you answered yes, give up diving and take up golf....Breathe from the regulator normally or do many slow light purges of the 2nd stage. Banging on the purge button staccato style accomplishes nothing..

Go seek out a Calypso and have some fun.  


Monday, May 2, 2016

Argonaut Kraken assembly....last page

THIS IS NOT A SERVICE GUIDE OR REPAIR POST....DO NOT USE IT AS SUCH

The devil is in the details....final assembly is where its at and where everything comes together.
Getting the IP set is the most time consuming part of setup.  The average trunk monkey will simply turn the adjustment screw till the IP reaches the desired set point, stab the demand lever half dozen times and call it good. This is wrong on so many levels...Anyway, on to the pictures.
Main body to can O-ring is put in it's groove

Put on the ring that holds the body to the can and tighten down with the correct tool (made by Herman) 

Layout of the HPR second stage. 

Install and alignment of the demand lever and the 2nd stage orifice. Then the index tabs are torqued to spec.
Next a jig is used to correctly bend the demand lever. This step is critical. 
HPR demand lever height is set and checked. 

Screws are put through the exhaust can and O-rings are used to retain them. The tool is used to push the O-rings over the screws in one smooth movement. (Herman made it) Without it you wear off the skin on your fingertips pretty quickly.
Finally the two can halves are screwed together and torqued down.
Next the regulators go to the Quick Set fixture for a run.
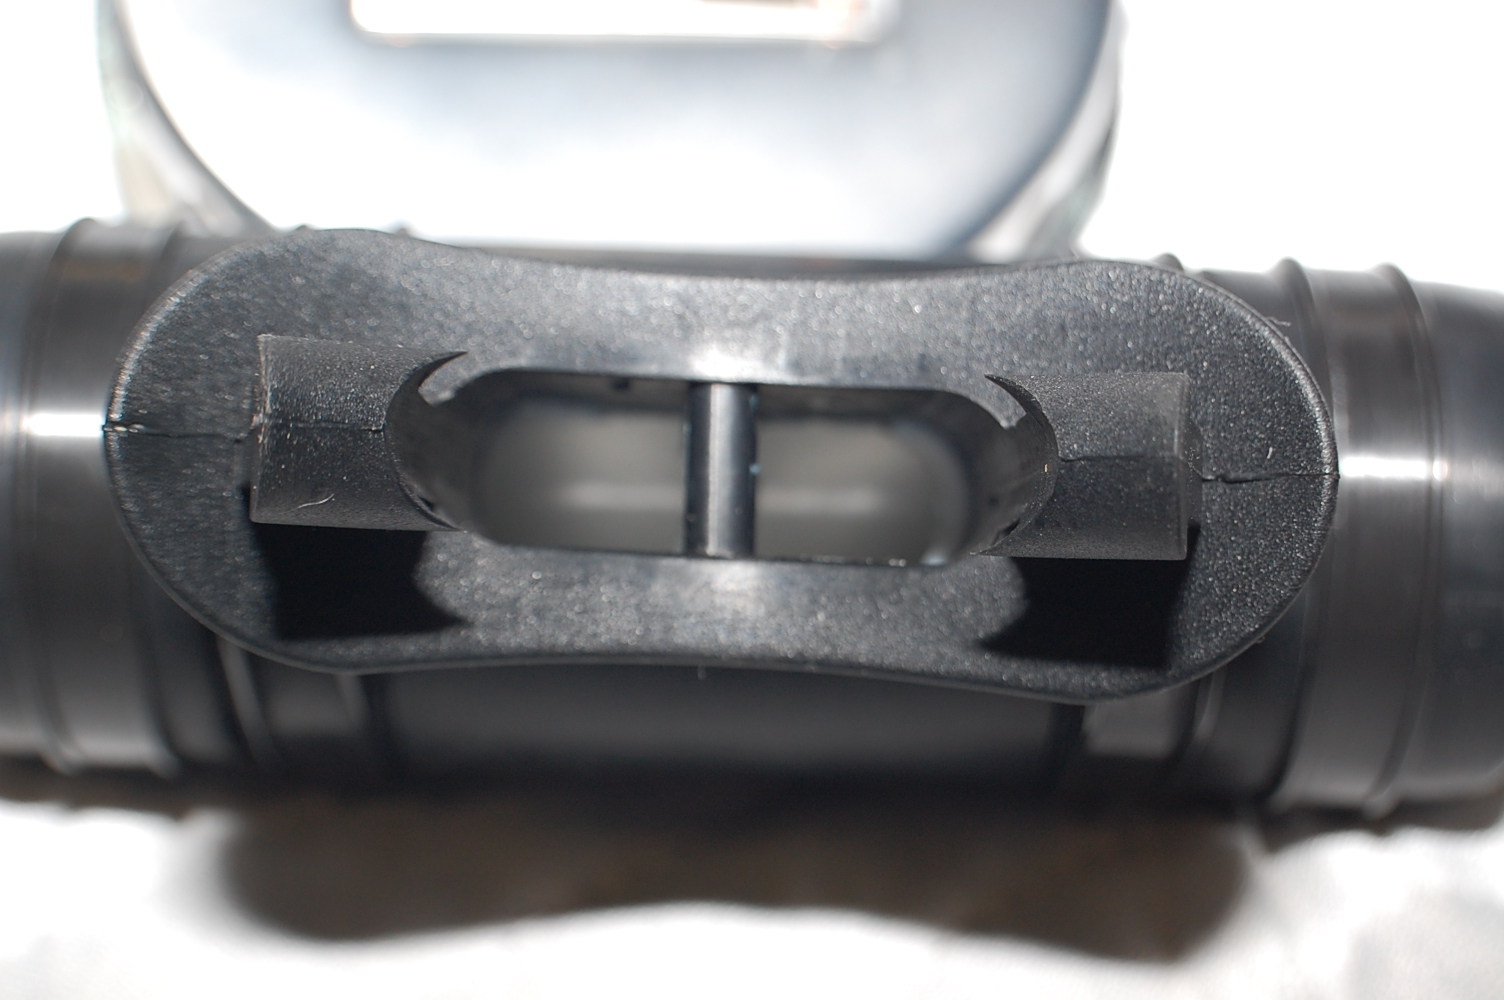
After that they are put aside and checked in 24 hours and put aside again and checked 24 hours later before they are ready to be boxed up and sent to the new diver. 

I hope you enjoyed looking at part of what turns a pile of parts into an Argonaut Kraken regulator. 
Once again this is not a Repair or Service Post.
There are dozens of other steps and checkpoints I did not cover in these posts.


Sunday, May 1, 2016

Argonaut Kraken Main Body Assembly

Argonaut Kraken Main Body Assembly

UP FRONT.....This is not a technical or repair post....This is a very brief overview of the assembly process of the main body. DO NOT USE THIS AS ANY SORT OF REPAIR OR MAINTENANCE GUIDE.....A service guide would contain the dozens of small but important details necessary to follow when assembling the regulator....THIS POST DOES NOT CONTAIN THEM.
The Argonaut Kraken bodies arrive in their own numbered box. The manufacture assures me they thoroughly clean and dry each one before they are packaged. After I take it out of the box and give it a once over I use various tools to chase all the threads and cotton tip swabs to final clean all the ports and orifice. Next I put each one in the ultrasonic cleaner with some Dawn dish washing liquid and a little Crystal Simple Green for one minute and then use compressed scuba air to dry them.  When I assemble the bodies I only use Cristolube in the limited areas where lubricant is required.

First up are all the internal parts on the HP side 
Parts all go inside and a guide for the snap ring is placed on top. 
Next I use the amazing multipurpose Argonaut press made by Herman to gently guide everything together and let the snap ring lock into place. This can be accomplished using simpler hand tools that he makes but I like the feel and control assembling on the press give me.  
Next it gets flipped over and the high pressure diaphragm section is assembled. 

Next the 3 of the 4 port plugs are put in. Put the O-ring on the bottom of the yoke and then the nut is put on and tightened down. 


Finally a modified 2nd stage orifice is temporally installed so the intermediate pressure can be set. 

On to setting the intermediate pressure


Saturday, April 30, 2016

Assembly and Setup of the Argonaut Kraken

Assembly and setup of the Argonaut Kraken

These posts are not meant to be a service/repair guide by any stretch.  I had a few requests to post assembly pictures so I thought while I had a little time before they arrive I'd show some of the process of putting them together.

This is what the cans look like when they arrive from the manufacturer

Pretty boring stuff. Looks kinda like a burrito waiting to go in the microwave.
First step is to punch in the 6 threaded inserts into the body side cans.  This is my least favorite and usually the most frustrating of the whole process.  The outer diameter of the insert and the hole in the can form an interference fit when they are punched in.  But when doing this the sharp edge of the insert often shaves off bits of the plastic and this gets caught in the threads and is tough to get out completely.  So to help minimize this I use short pieces of threaded rod in the inserts and then remove them after the inserts are punched down.
you can see all the HIGH TECH equipment used in the process....brass hammer, block of wood, and a special brass punch that Herman made for me. 

After all 6 inserts are punched in I remove the threaded rod sections and blow out all the holes with compressed air. Next using another specialty tool that Herman made for me I go back though one more time and chase all the threads again.  In 2014 on the first run I ruined many can halves during final assembly due to tiny pieces of plastic in the threads and a little too much torque which twisted the hex head in the can and ruined it.  I have worn the threads off of the tool in the picture below and it's rusty from the sweat from my hands from holding it so long.  I figure I've chased the threads in over a thousand inserts......Did I mention I HATE this part!
Next we move on to the exhaust side can.

I use a little alcohol based hand sanitizer on the exhaust valve for lubricant when I push it into place in the can. 
Dave make the can labels for me and it's a very painstaking process so I don't have extras around to spare. Forming them is not a time to be Mr Bumblefingers!

First the label is placed upside down in a special die that Herman made for me.  Next the cap goes on it and it's pressed though the form using the amazing Argonaut multipurpose bench press....Another tool that Herman made for me.


The tabs on the label come out of the form in a C shape and when I go to attach them to the can I want the tabs at as close to a 90 degree angle as I can get.  So I place them on the edge of the press and give them a couple of strikes with a brass hammer where the label and the tab meet to get the angle I'm looking for. 
After that they get set aside and wait for a body to be matched up with. 

Next main body assembly!


Sunday, November 22, 2015

 A little history on the quest for a double hose DSV mouthpiece.

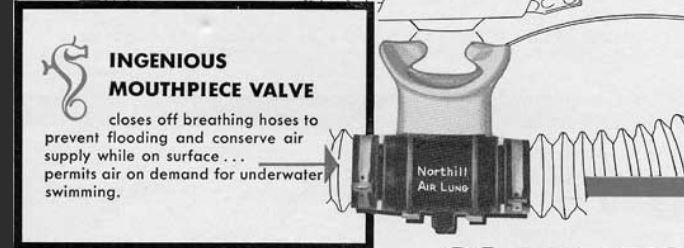
I have wanted to offer a DSV style mouthpiece for double hose regulators ever since I saw the one that came on the early Northill regulators
Northill DSV.JPG
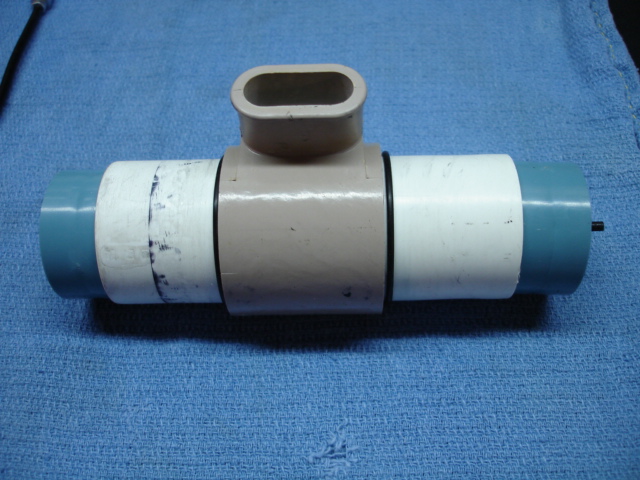
Around 2008 Luis and Allan came up with a neat idea for one using two straight USD mouthpieces with a PVC insert inside. Problem was you had to cannibalize two good mouthpieces and use a lot of lubricant to keep it working smoothly.
DSC_0087.JPG
Next I worked with a fellow diver on a completely new mouthpiece that had some promise but also some design flaws that were never worked around. Many of you have seen the video of me testing it in the pool.  3D Models a few years ago didn’t hold up well underwater like the material used for them today so testing was brief. Good idea but too complicated and I’ll skip the details of why it never went any further.DSVjfhf.jpg

I gave up on the idea for several years, Luis and I along with many others concentrated on making the Argonaut Kraken a reality.  All along we wanted the Kraken to have it’s own mouthpiece but resources and time were stretched beyond the breaking point and the idea had to be shelved for the time being.
Exactly when my next brain storm came about I can’t say for certain.  I had been working with a Drager DSV mouthpiece for a while and trying to figure out a way to make one that was less complicated and that I could make affordable to offer it with the Argonaut Kraken. At the time their DSV’s were over $300.00.
Under my workbench is a big box of mouthpieces and from time to time I would spread them out on the table and try and come up with some idea that showed promise.
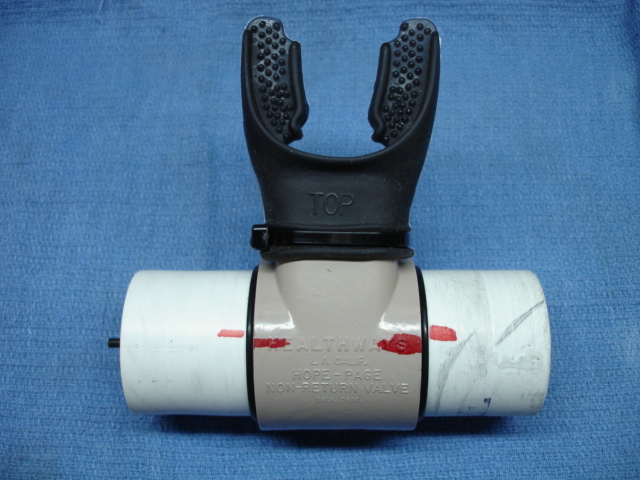
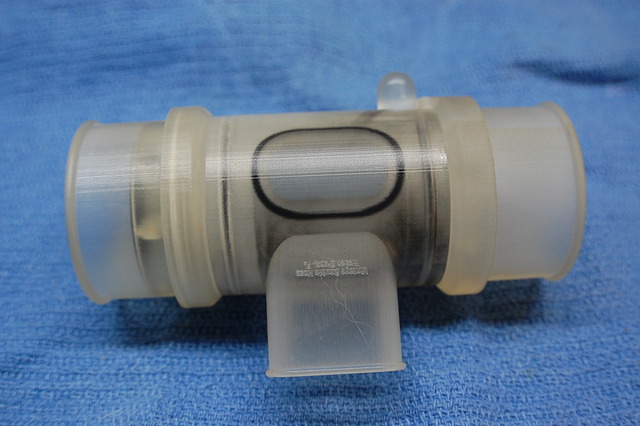
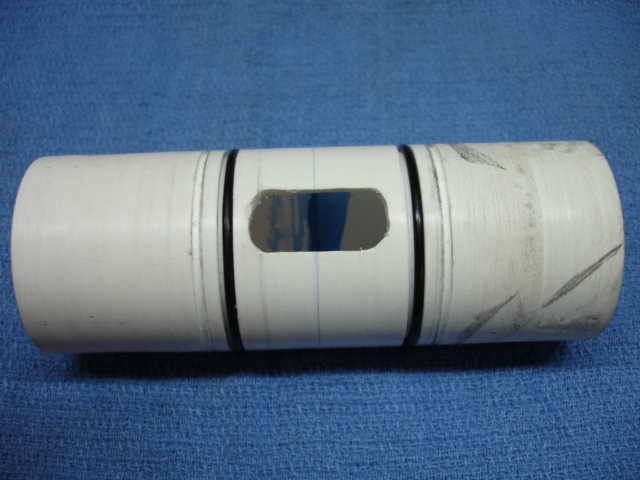
Messing around one day with a Hope Page I got the idea to make a simple tube that would go inside the mouthpiece that you could rotate closed or open as need dictated. It would be sealed by O-rings and use the wagon wheels and valves I already had.
DSC02241.JPG


DSC02250.JPG
DSC02253.JPG
Tom (Captain) on the VDH Website Message Forum did all the machine work in an attempt to get my crazy idea to work…...It did work and it would shut off air at the surface but it would not seal up and water leaked in it like a screen door on a submarine.  Plus I would feel kinda bad cutting up a bunch of classic Hope Page mouthpieces to make them.

After we got the Argonaut Kraken up and running Luis asked me to send my crazy idea to him so he could look at it more closely.  At this point I was asking him to reverse engineer the Drager DSV so we could simplify it and possibly make a cheaper version.  Luis used the Drager on a few dives and proclaimed that it sucked and was not going to make one like it.
The Drager and every other DSV mouthpiece made for rebreathers we looked at had the same basic flaw….The mouthpiece sticks out straight like the original USD straight mouthpieces and that puts a lot of leverage on your teeth and jaw making them uncomfortable to use for long periods of time.
The Hope Page mouthpiece did not and follows a curve like the later USD curved mouthpiece does.
Luis took my idea and modified it a few dozen times and after a re-design or two felt we had something we could work with and as flawed as it was he did some diving with the Hope Page Frankenstein mouthpiece.
At this point I was happy and was ready to get the 3D’s done and start making it. Luis was not ready to pull the trigger as he knew that with the right idea the new mouthpiece could do more than offer a comfortable bite tab and the ability to close off the hose loop.
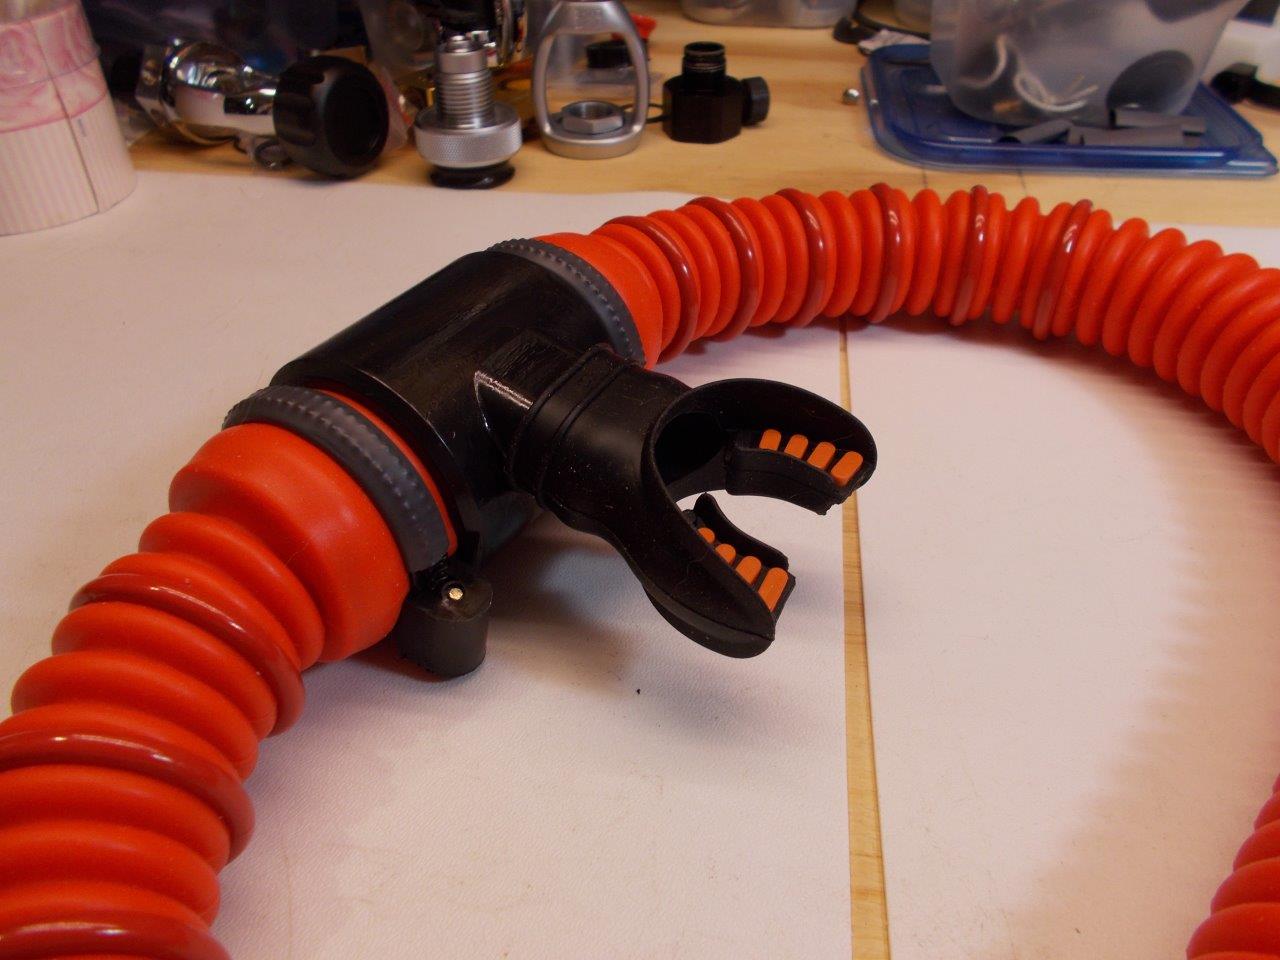
He started working with the idea of putting a diverter in the airstream that would allow the regulator to maximize the airflow of the venturi without most of it escaping down the exhaust hose. I think we started with 4 different heights and various angles before he settled on one that let the Argonaut Kraken maximize it’s airflow capability without becoming a positive pressure regulator like the Over Pressure Breathing model USD made for a short time did.
DSCN1994.jpg
After the first 3D model was made, minor revisions were made to the other two and we started diving with them. The first one I used in the pool did not have a diverter but the other features worked flawlessly.
Luis started diving with them and experimented further with various weights on hoses and the mouthpiece attempting to get the whole assembly completely neutral in the water.
We packed up the whole show and took it to Cozumel so we could dive as much as possible and give other divers the opportunity to use it and get immediate feedback from them.
I’m now ready to build the mouthpiece for the double hose divers of the world and give them a whole new chance to outfit and fine tune their regulators to fit their diving style and needs.

Once again we have a community that made this happen.Skilled craftsmen like Tom and Herman, professional Engineers like Luis and even a rocket scientist took ideas and turned them into reality. And last but not least I’d like to thank the Caribbean Luxury divers for taking part of their Cozumel vacation to test our ideas and give constructive feedback.

I hope on November 27th you will jump in with the team for the big win and help me get the Argonaut DSV into production.

This post is made to be a brief overview of the path VDH has been on.  Luis is sharing many more details and data around it’s design and development on the VDH Website Message Forum.  Please take the opportunity to come over and join us.  
DSV evaluation team.jpg

Thursday, October 1, 2015

Look it up on Google FNG....How not to grow your community.

There are no stupid question....Only stupid answers......Getting into any new hobby can be a bit intimidating and comes with a plethora of unanswered questions running around in your head. The internet has made even the smallest niche interest, hobby or sport available to everyone though BB and Website Forums and has allowed us to gather up information from around the world that we may never have known about before. They put us in touch with others with similar interests and who want to share those with others.  Let me share a personal aside for an example. 
Most of you think I do nothing but blab on about double hose regulators and old scuba gear 24/7....and to an extent you are correct.  But I do have a few other interests and hobbies that I like to pursue with the limited time I have. Recently I rekindled an interests in a particular type of car that I owned years ago and thought it might be nice to get another one so I could have another source of endless frustration and expense other than you guys and my 10yr old. ......I joined what I looked to be the largest community of folks working with these types of cars.....After joining I asked/posted a couple of questions I could not find the answer for and was amazed at the responses I got.....NOOOB....Look it up on Google.....Use the SEARCH FEATURE.....FNG....etc etc......This took me back for a bit and I was a little P.O'd till I realized that on OUR OWN FORUM many of us are guilty of doing the same thing.....Yes my eyes bleed every time I get a question about "Can you fix my double hose"  or "does anyone still make parts for double hose" etc etc...BUT to many people these are important questions.....YES they should have read the FAQ and or used the SEARCH feature but if we slam the door to the club after the 1st knock they may not choose to knock again!

So, what I have done on the forum is put a space for New Vintage Equipment Divers to ask even the most mundane and rudimentary question in a 100% flame free zone.  With absolute certainty I will guarantee that a knowledgeable forum member will answer ALL questions in a polite and thorough manner. 
No one likes to be the new kid and it can be intimidating but I hope with the addition of this area of the forum more people thinking about diving with our type of gear will feel more at ease asking questions and getting the answers they are looking for.  We only grow our area of diving by sharing it and I want the website and message forum to be a welcome and inviting place to learn.

Now I know all of you reading this know everything there is to know from SPACO to Argonaut...:<wink>  BUT you may know a friend or a family member that doesn't yet so I ask that you share the website forum and particularly the new place so they can jump in with the team for the big win.

Take this with you and share it with anyone who might be interested please. 

When you first look at diving with vintage gear, discard all pre conceived notions, urban legends and related BS told to you by well meaning but ill informed divers you might have talked with on the subject.....Instead ask what can I learn or what new adventures could I have diving this gear?  Why does it appeal to so many divers after most of it stopped being made 40 years ago?  Take the time to read and research and find your own place in the community.  The divers on the VDH website message forum are there to help and I guarantee you will get no better advice on vintage equipment diving than they have to offer.

Saturday, September 26, 2015

Argonaut 2016 Update

With success comes complications and new opportunities. For the past decade most of the parts I have been making have be either replacements for existing ones or improvements to them with a few exceptions like the Phoenix and HPR 2nd stages. 
When the Argonaut was ready to be made I went about it in the way I had with all other parts in the past.  Submitting requests for quotes with drawings and materials specifications and working from there. Over the years I have developed a good relationship with several manufactures and go directly to them depending on what the part is made from. None of them are in the business of scuba gear and don't know a duckbill from a band clamp ring.  In the majority of cases this was fine and played very little in the outcome of the parts.
 
The Argonaut was a whole different ballgame.  I needed to somehow get the suppliers to understand the concept of what I was trying to accomplish. In some cases this was successful and in some not so much.  Manufacturing is a business. Making regulator bodies or carburetors, it all comes down to dollars and cents and getting the HP diaphragm to work harmoniously with the regulator really made no difference to the two companies making the parts. 

Cost to the customer was always a paramount concern of mine and was driven up by my need to go to third party companies to supply parts for the Argonaut assembly. Plus I was always at their mercy as to supply and future availability of parts. After the last of them went to new divers this year I set a goal for myself that I would no longer be at the mercy of third party vendors. A goal I realized 3 years ago was necessary for the long term success of the project.
 
Right now I am working with a company that manufactures regulators for SCUBA and SCBA and who fully understand what I'm trying to do. They might not get the reasons we want a double hose in the 21st century but they are game to do it and are on board with the project.  I have paid up front for the tooling necessary to manufacture the body of the Argonaut and I am awaiting their sample parts. These are due to arrive towards the latter part of November. 

What this means is that I'll be able to produce a regulator using many of the ancillary parts they currently produce and use on some of the single hose regulators they make.  This will allow me a single source to produce the regulator bodies, yokes, screws etc.  The other parts I have covered currently direct from the manufacture. All of this cuts down on the cost and headache of juggling 12 different companies supplying parts.  It also means the vendor knows what is being manufactured and if there is a problem they can solve it quickly because they have most likely faced it working with other regulators.
 
The regulator itself will change very little as to how it functions or performs.  We had to make a few changes to accommodate and use some of their existing tooling but overall the regulator will remain as amazing as it already is. 
This is the main reason I don't have an EXACT date that new Argonaut will be available in 2016.....If all goes to plan, I can give the OK to the sample parts, ramp up and get them out in January but I'm not at the point where I can do that.  I will keep the Vintage Double Hose website store, Facebook page and Vintage Double Hose Message Forum updated with the latest details on where I'm at. 

Luis, Herman and I along with the test divers are working hard to insure the new DSV mouthpiece and hose assembly is ready in time for the 2016 Argonauts as they will be the new standard for it in the future. 

I can't thank the double hose community enough for their help and support and I ask the future Argonaut Divers have a little patience :)